Remember you do not have to remove the whole deck. Separating from the transom area to the rear doghouse may enable you to do all the repair or modification you need. I have also cut out the deck area between the dog houses to do repairs to this area only. This requires sanding back and rebuilding the crosscut area on the deck and is harder to keep a good cosmetic look but it will get the job done. On an older boat this may not matter to you. Indeed if you are not willing to remove the whole deck then a smaller transom to rear doghouse may be enough to tackle for your first attempt. Access ports may also enable you to get at areas needing attention but I find they are prone to leakage or loss of the cover.
However if you do remove the decks then you can:
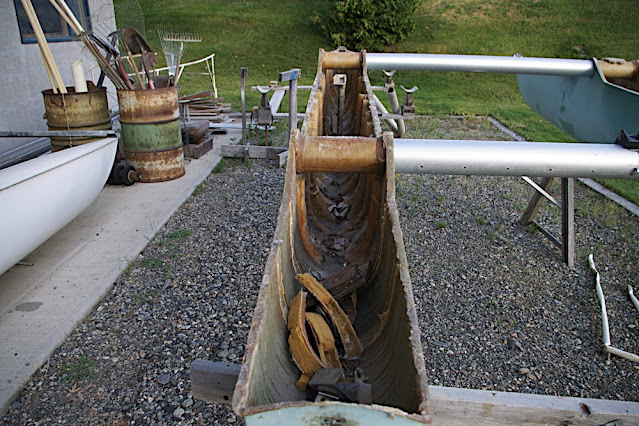
- Repairs to the inside of the hull, underside of the deck or daggerboard trunk
- Removal of rotted wood at transom, strengthening of transom
- Removal of waterlogged foam if any.
- Replace with positive flotation material or bag or nothing(your choice).
- Reinforcement(if necessary) of the sidestay with aluminum plate and extra layers of glass. Always use Stainless Steel rivets on any high stress areas.
- Replacement of typical drainplug setup with tapped hole to directly accept typical drainplug.
- From transom to deck internal downhaul line tube to downhaul rudder blades. Takes a lot of stress off the transom. Use a waterproof system.
- Removal of non structural material(weight saving)
- Create drainway hole in ribs at bottom of hull
- Through bolt the main and rear beams(2 bolts each) to make boat more rigid and allows removal of screw heads on top of each doghouse(can’t take boat apart after).
- Attach chainplates on transom to allow installation of transom mounted rope traveler for end boom sheeting so that cow horn steering can be replaced with single stick tiller.
- Widening the boat to 6’6”(longer 4” tube or inserts to widen), replace 2”bow tube with longer tube sitting flush on top of bow aluminum castings(modified[cut] to accept top mounted bow tube-can be thru bolted to also help stiffen the boat-hopefully will have pictures to show) Bridle wire slot will have to be cut through bow tube to allow strong attachment to one of the through bolts
And anything else you can think of.
Once you have completed the improvements, check to see that the deck will mate properly with hull at critical areas such as the new collar area built beforehand around the dagger board trunk, and the two dog house areas.
If you are ready with all items needed in place, catalize the resin you will be using allowing a long setup time(2-3 hours), paint both mating surfaces on deck and hull with some catalized resin.
On the polyethylene covered table paint a strip of resin roughly equal to the strips of cloth you have prepared before hand to lay on the lip of the hull. Lay a dry strip on the resin you painted on the polyethylene then wet out the cloth before taking it to the hull to set on the lip. Continue this process until all of the hull lip has a wetted strip of cloth covering it.
Next add wood flower or microballoons to thicken the resin. Begin dripping or applying this thickened resin on the lip of the hull all the way around. Pack some wetted cloth around the hardened collar on the daggerboard trunk.
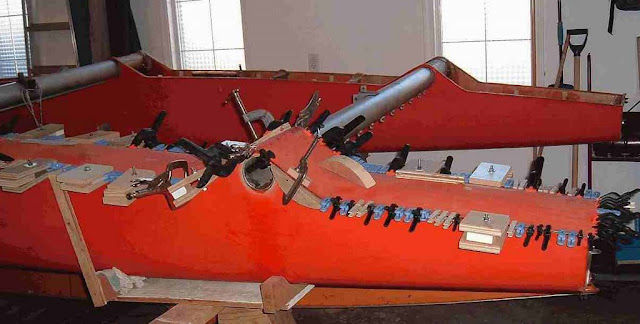
Carefully lay the deck onto the hull and begin clamping. Start at the dog houses first and use your best clamps here for a good fit. Try to spread out the pressure using blocks of wood 4or 5 inches long. You can after removing the clamps fill any voids that you miss with thickened to a putty resin. Try to clamp all areas of the hull/deck joint. The more clamps you have the better. You can see pictures on the technical picture section to get an idea. This job is easier with two people but can be accomplished with one person.
I like epoxy resin in the winter months as it doesn’t smell like polyester. I use polyester in summer as I can leave garage doors open to get rid of the smell. I have more trouble with polyester resin going off before I would like it to. With time critical jobs slow setting epoxy is better. You must pay attention to all the warnings associated with either of these two resin systems as there are health warnings associated with improper use. Study all the literature you can about fibreglass and resin systems so that you proceed with this job correctly.

This is potentially the most time consuming important decision to enhance your boat strength and performance. Plan everything you plan to do beforehand and consider all improvements for this project so that you do not have to do it again because you forgot one thing.

